 Tweet
Tweet
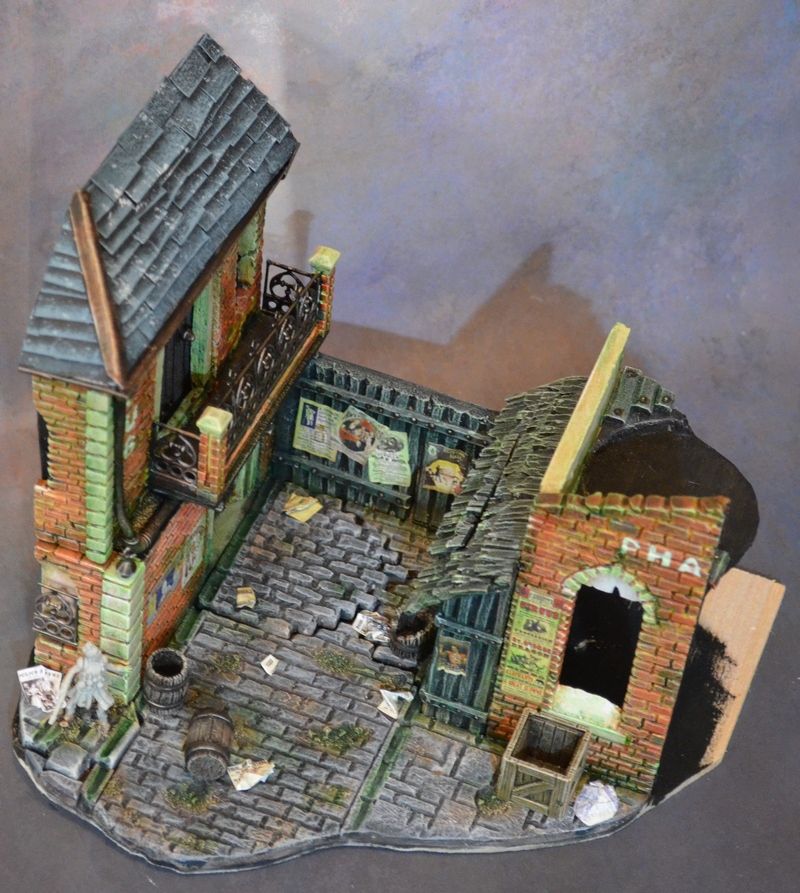
Knowing that Infamy is about to become a skirmish game, I also wanted to make my minis playable later on so I had to devise a way of inserting the minis into the diorama without it looking too obvious.
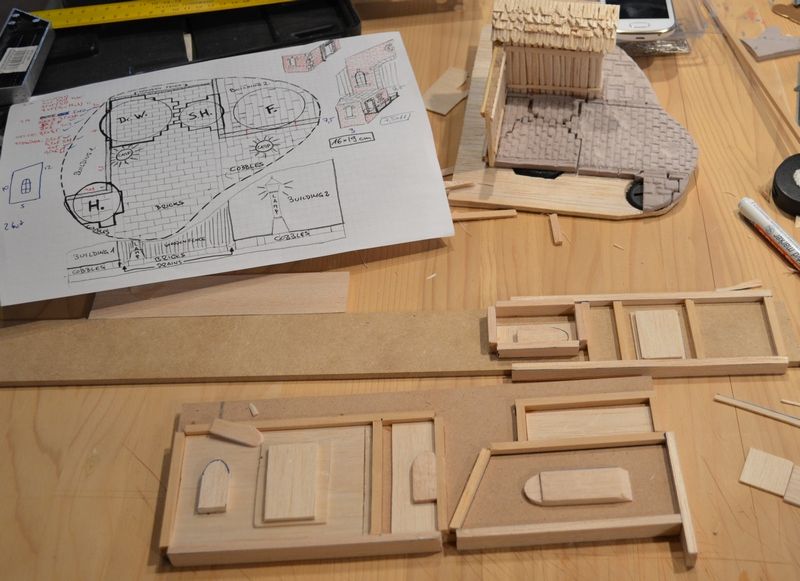
When approaching such a project, I always start from a sketch, roughly outlining what I want to do and where I want to go with my work. Making a sketch in scale helps a lot as you immediately see what fits and what does not. Here is what I came up with.

Since there was a sale of sculptiboard on the Wampstore and me never having worked with it before, I decided it was a perfect opportunity for me to check it out. I ordered some and not a week later it arrived. I used a copy machine at work to make a couple of 1:1 copied of my sketch in scale and cut out the various pieces I needed. Then I put them on the sculptiboard bits and copied the design onto it.

The sculptiboard was then cut using my jigsaw and the cobbles were engraved using my Proxxon drill. After engraving I used the same tool with a round grinding head in order to round the edges and to get that worn out look of the cobbles.
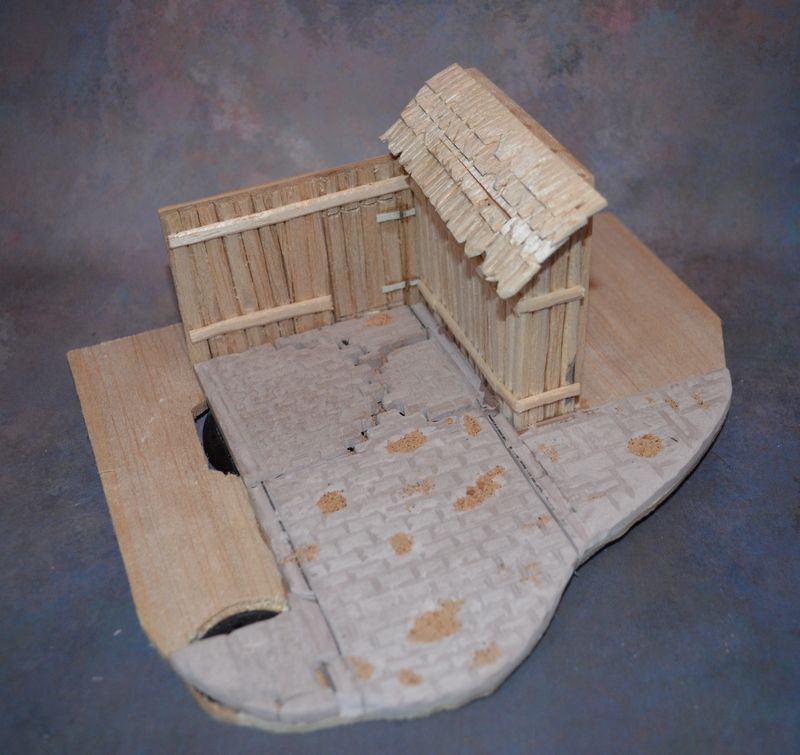
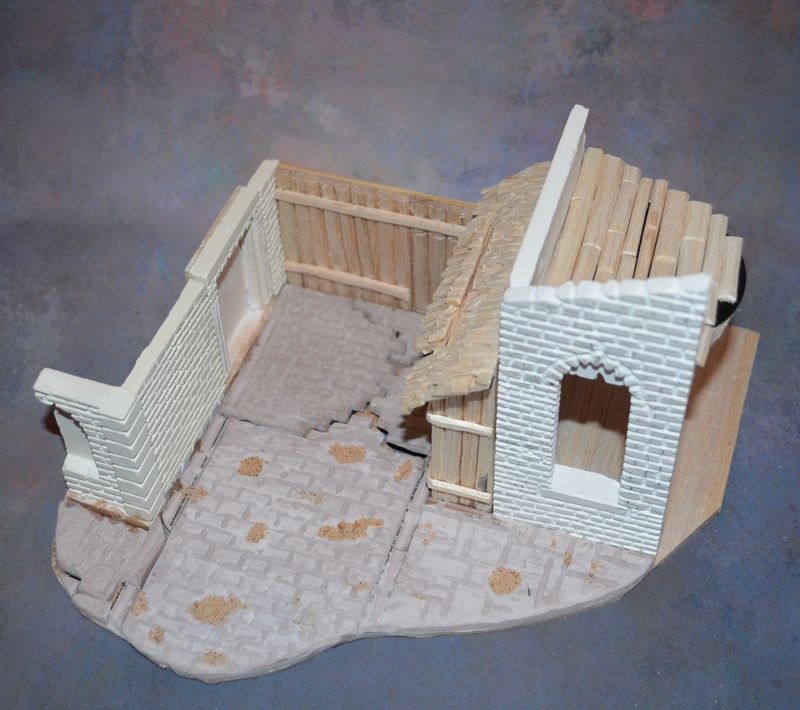
After finding everything fit satisfactorily, I proceeded to make the shed and the fence out of balsawood. I used 2mm thick balsawood which I cut into planks and glued them one on another. The wooden shingles were done the same way, one shingle at a time..
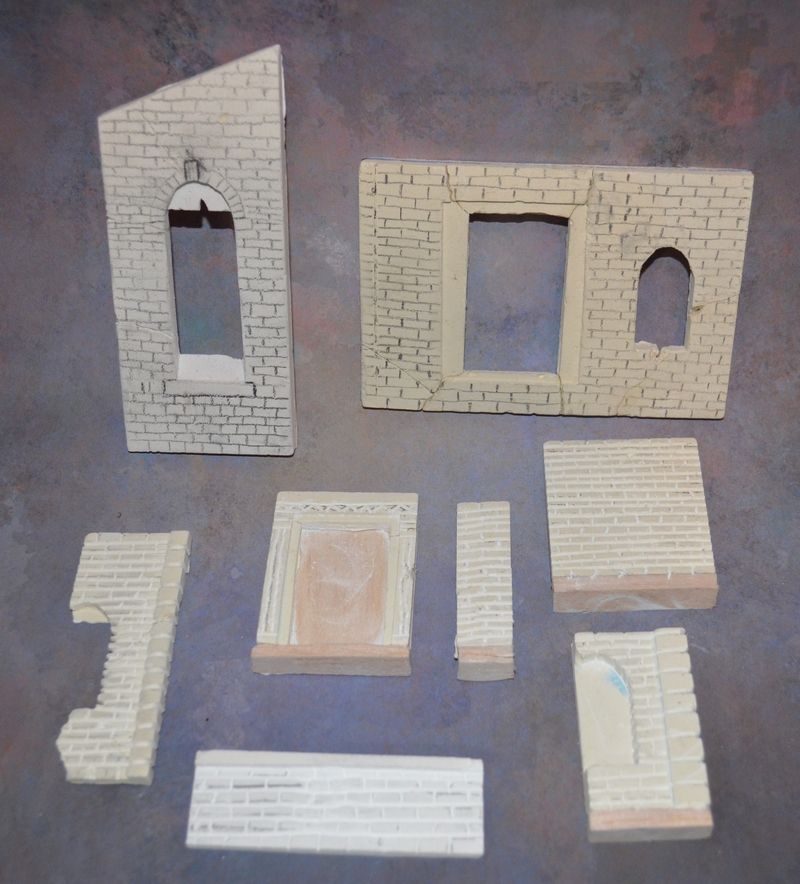
I made the brick walls by first building custom moulds - out of balsa. These moulds have to be destroyed to remove the cast so they are really one use only. It does, however, really speed up the process of casting as it enabled me to do all the moulds and casts in about two hours. When using this method, just remember that left is right when making moulds as then you get the the smooth surface (that is on the bottom of the mould)...
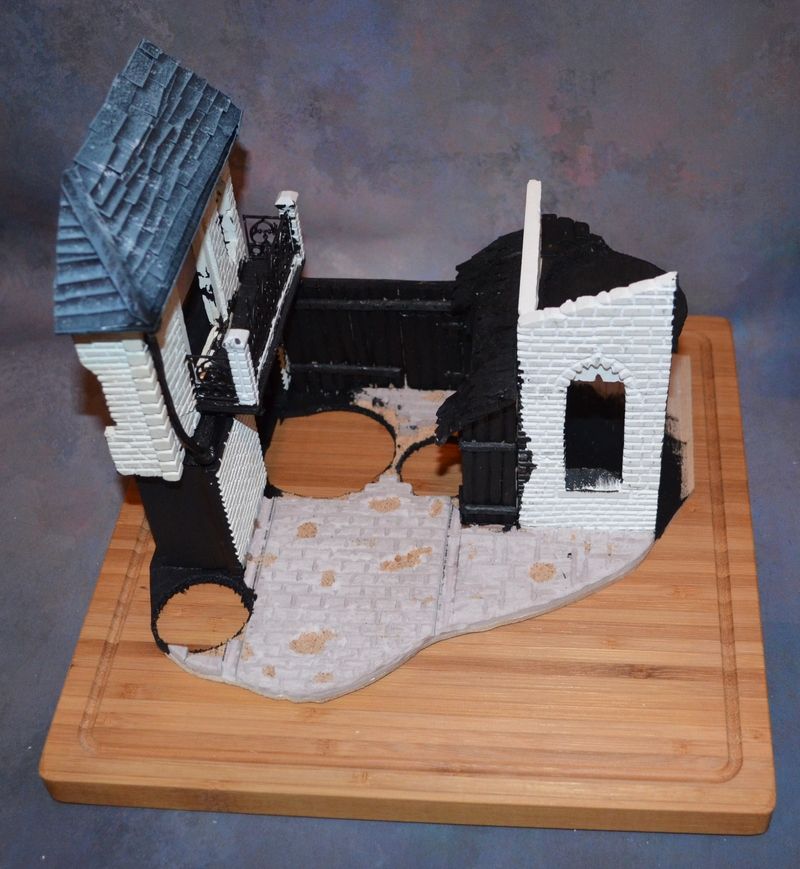
And once the plaster was dry, I removed it from the moulds and assembled the first mock-up of the diorama.
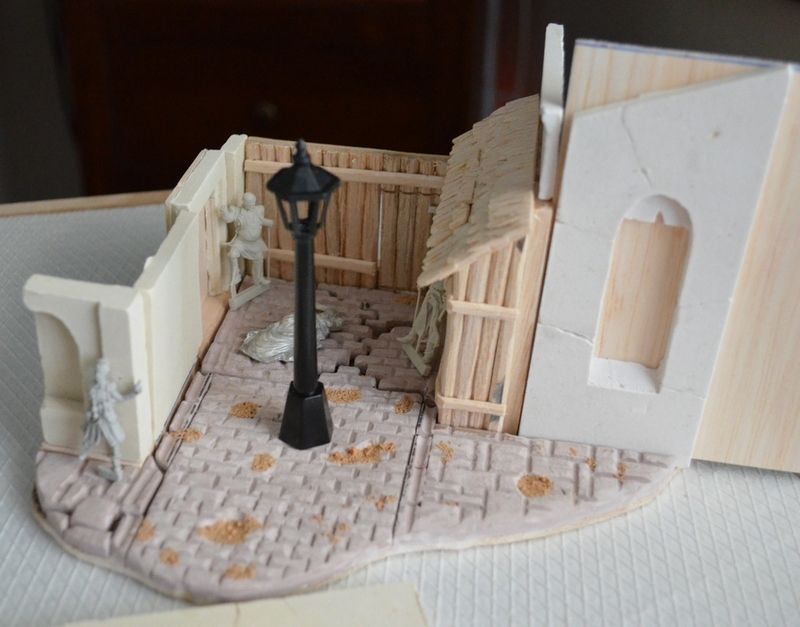
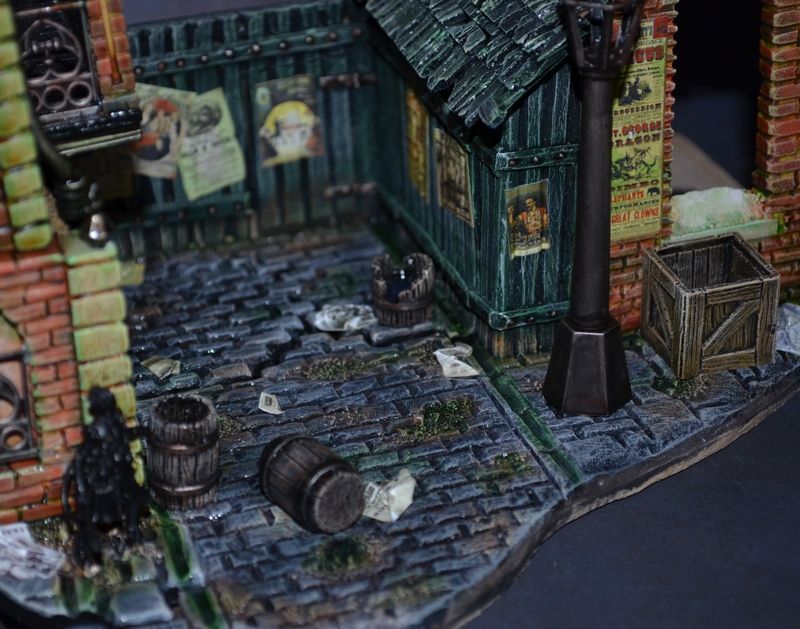
The lamp is something I found in a hobby store here in Zagreb (and I would put an LED inside). When I did this mock-up, I realised that having two lamps will be too much so I decided to go with only one that was originally going to be in the middle of the alleyway. After consulting with my mates, they persuaded me to move it a bit further towards the shack.
After drawing the brick pattern to the walls, I then proceded to carve the bricks into the plaster walls. I did it also using power tools. Plaster can be engraved using a sharp object like an icepick but for an aerea this size it would have taken far too long. When drilling/grinding/milling plaster or sculptiboard remember to use a mask as the debris is harmful to your lungs.
After the carving was finished, the ground floors of both buildings were glued to the display base (and the two wall pieces on their respective gaming bases).

In the end the podium (roof actually) for the fourth mini (Frank) has been built out of balsawood similarly to the shack.
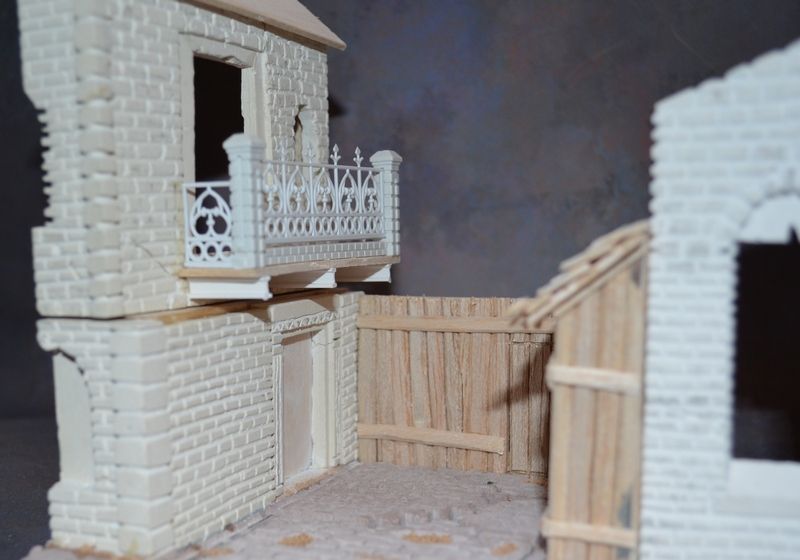
I then made the first floor and the roofing of the left hand building which basicly finished the building part of the diorama. Once everything as in place I noticed that, because of the balcony, I wouldn't be able to pull out the Watson's base. That meant that I had to make the entire first floor detachable as well. The first thing that sprang to mind was to fix it to the bottom part of the base with two pairs of magnets. The method worked like a charm mainlay because the plaster wasn't heavy.
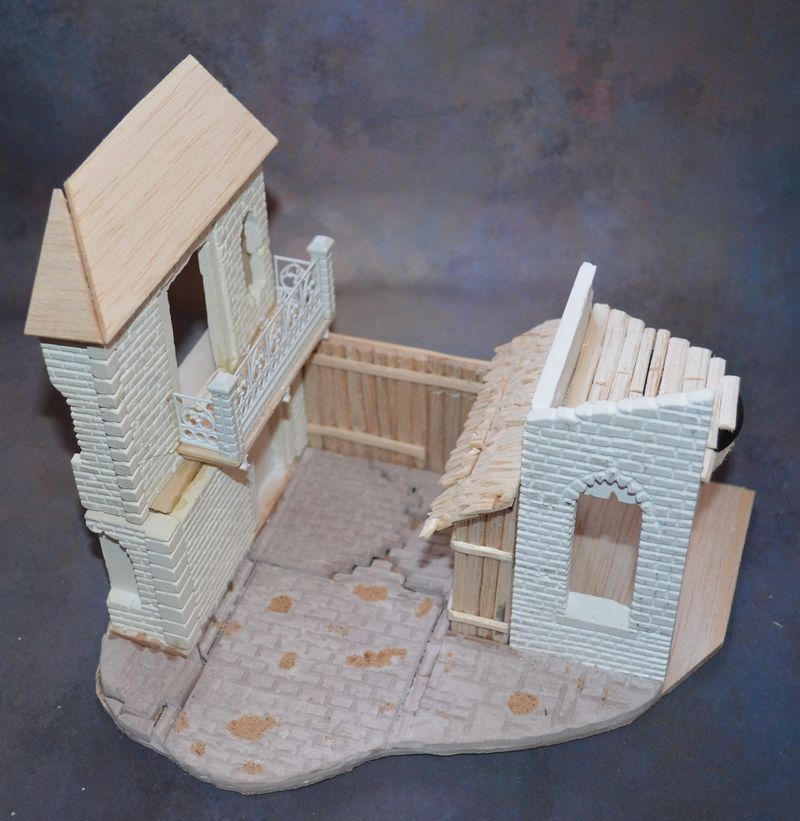
The balcony undercarriage was an I-beam plasticard bit from Evergreen and the railings on the balcony was bought on ebay (just search model train fence and a number of cool looking results will come up that are neither expensive nor do they add shippment fees).
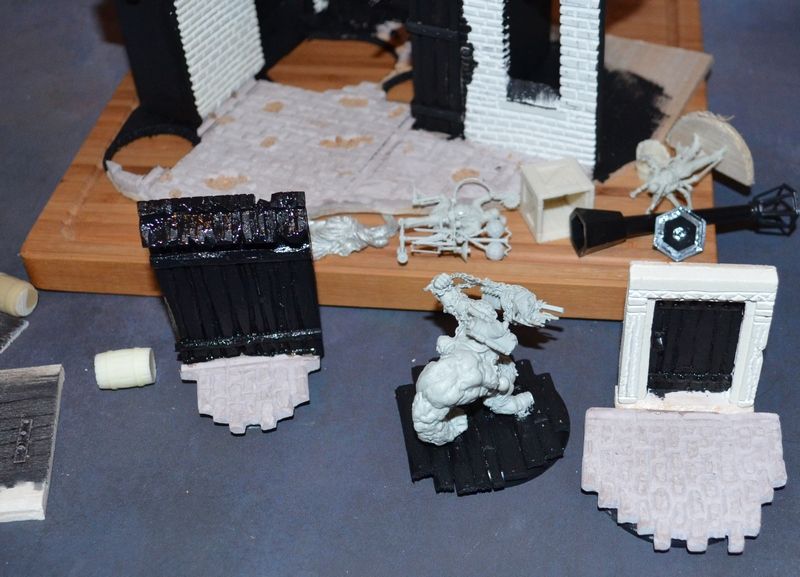
I then assembled the minis doing some minor converting on Henrietta, removing the vial from her left hand and bending it so she can grab the wall behind her. I also cut of her head and respotted it so she looks to her left and up - towards Frank...
The rest of the minis are more or less as is except I removed the bag of bodyparts from the Watson's base and replaced it with a female victim. I used a Wyrd miniature from the Kirai Avatar boxed set.
On the base I added the drains on the lefthand building.

While the minis were in place I checked whether the main idea of the diorama was working � did Henrietta have a line of sight to Frank. It worked a treat as long as the lamp was next to the shack. If the lamp was placed in the original position it would have obscured the view and not to mention that both minis would be behind the lightsource in relation to eachother so the whole thing wouldn't work.

That ended the building part of the project. Undercoating was the next step. I undercoated everything wooden black while I left the sculptiboard and the plaster walls thier own colour. When casting the plaster, I added some beige colour to the lefthand building bits and added pure white to the righthand building bits.
The slate tile roof was painted first.
I painted the messy (rough) wooden bits next. I used my new Scalecolour paint set. Mostly greys which I then stained using Thrakka green wash and Waywatcher green glaze...
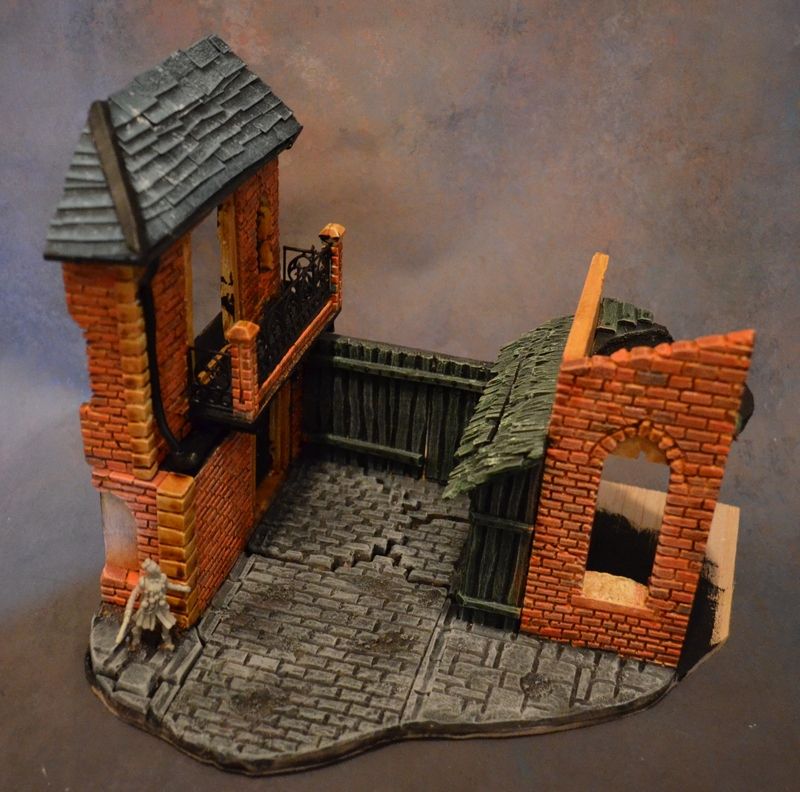
I then, painted (also roughly) a basecoat of various shades to the pavement blocks and cobbled stones. and also added "basecolour" to the brick walls - I just simply washed them with Seraphim Sepia...

I then applied a generous wash of Badab black to the pavement and the cobbled stones and did the basecolour of the bricks (I used about 9 different colours ranging frome Dark Flesh through various reds to Fiery Orange and a couple of brick I even did grey).

Finally I drybrushed all the brick walls with a dark orange and afterwards Fiery orange and in the end Fiery Orange + white mix to tie in all the colours of the bricks into a uniform wall.

The next step was to paint the cobbles. I used several layers of grey, finally finishing with pure white.
Next step was to do heavy washing using greens and browns to get that mouldy wet look. At that point I also decided to make it all wet as if the rain just stopped. To do that i have filled the gutters with Vallejo Still Water, made a few puddles, had the puddle of blood dilute itself into a couple of puddles of water etc..
Thinking of mixing the blood with water brought me to the next part of what I've been doing. Never done blood in that way I needed to check out what to use for blood. This was my experiment, going from left to right:
1. PVA + Tamiya clear red
2. PVA+superglue+ Tamiya clear red
3. TCR + superglue
4. TCR + Still Water (Vallejo)
5. TCR + Still Water + superglue
6. Still Water + TCR + Devlan mud
7. TCR + Devlan Mud mixed and then added Still Water..
The last option was looked the best and it would give me the best option to make the effect of diluted blood in the water puddle..
As the experiment blood was drying, I painted the corner stones (off white/beige colour)
then I painted the metal parts. Next, I printed out some words (Pub and Pharmacy) and cut out the letters leaving me with a template for painting it on the walls...


and finally the last thing to paint was the dirt on the road.
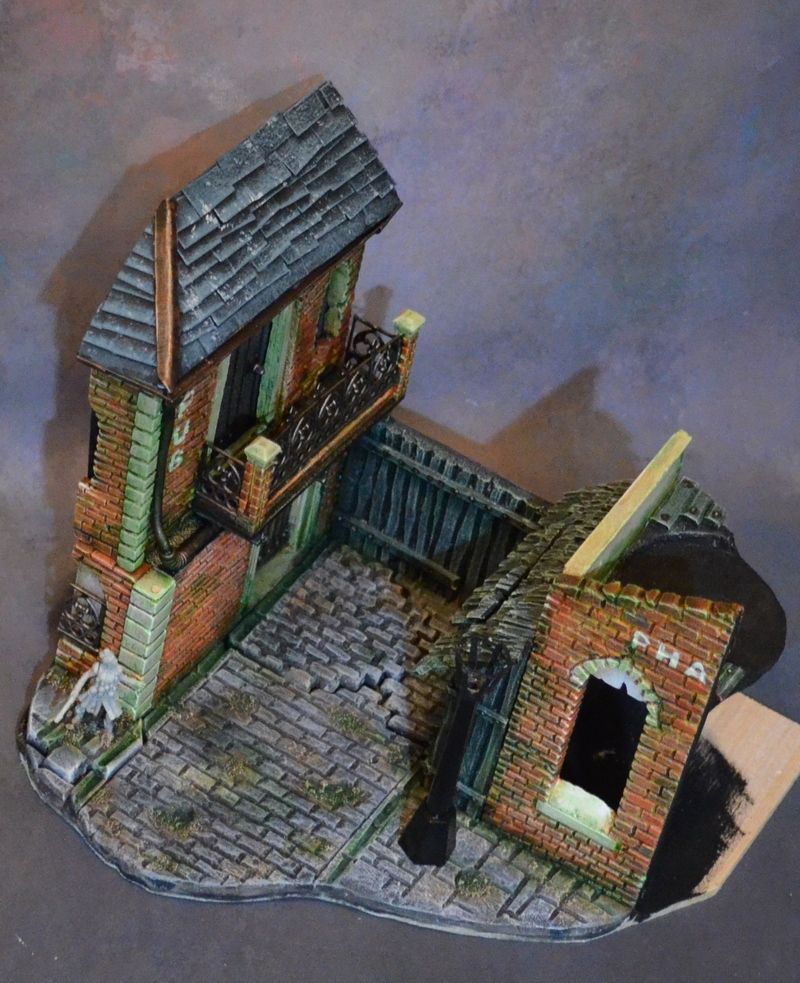
In the end I added the green glazes and washes.After the glazes, I needed to add those little personal touches that make every diorama interesting while putting it in it's time and place. After extensive search of the Internet I found a great deal of posters and newspapers from the Victorian era. I then made a collage of all of them in various sizes (so I can pick whichever suits me the best) and printed it out using the highest possible resolution. After gluing them in place using PVA glue, I added the same washes and glazes to them to tie them in the background. Also, after the glazes dried I highlighted parts of the posters again.

When dry, I applied the Vallejo Still Water to all the horizontal surfaces to simulate the wet look of rainy London.
After I was satisfied with the looks of things I drilled a hole in the pavement where the gaslamp was going to be placed. Inside it, I put a 5mm Amber LED connected it to a 50 Ohm resistor, a slide switch and a battery (Cr2032) housing in a serial connection.
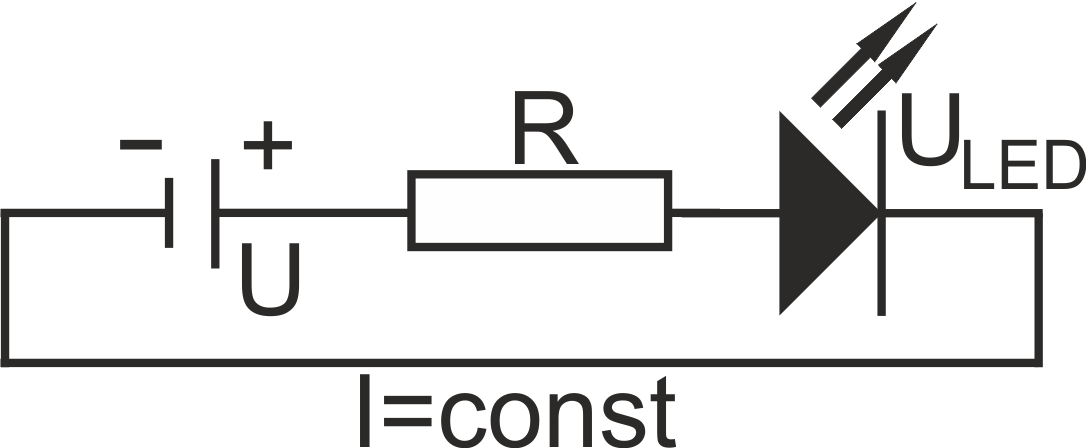

The size of the resistor is easily caluclated through the following equation (that uses Ohm's and Kirchhoff's laws):

So in this case, with the U = 3V (one Cr2032 battery) and the data from the grafs you can easily calculate that:

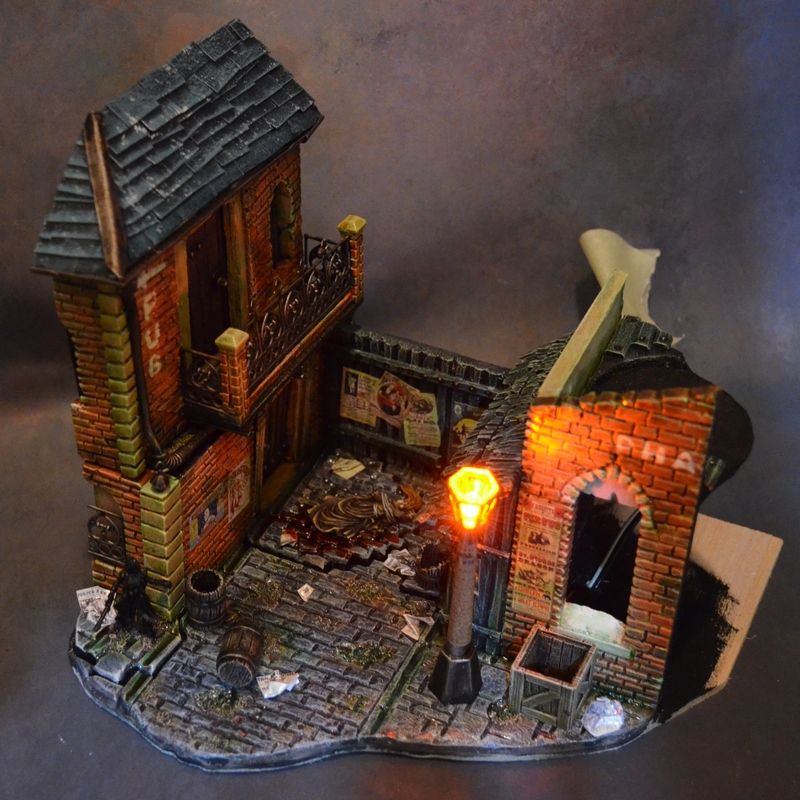
The last thing I put in was the window of the pharmacy. I did it by using a plastic foil for an overhead projector which was put in a frame made of 2 x 2 mm linden slats.

Once I painted the miniatures, the diorama was finished.


always good to see the terrain master at work mate :hail: